Business Account: How to create and edit the listings manually?
Learn how to create and edit your listings
- Go to Listings in your Business Account
- Select the Dashboard
-
Click the Add Listing button on the right side

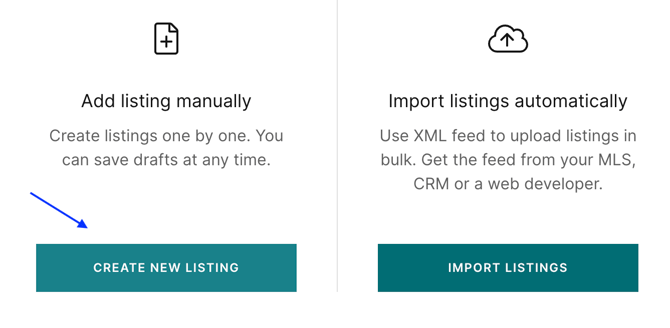
- Choose Add listing manually and click Create New Listing
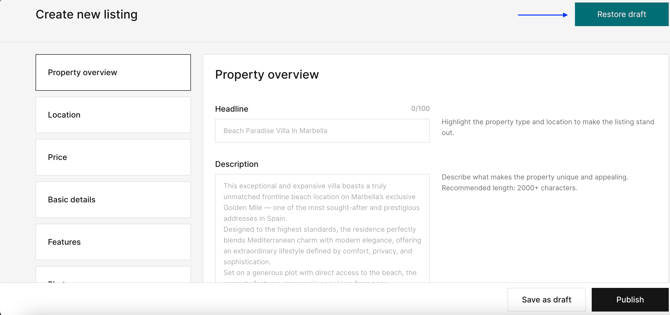
- Select the appropriate category for your listing and complete the form

Now you are ready to fill in the information about your listing.
2. Location
We’ve simplified the address entry process. You just need to enter the address manually, select from the menu the most accurate one, and the system will automatically display a location dot on the map based on the details you provide.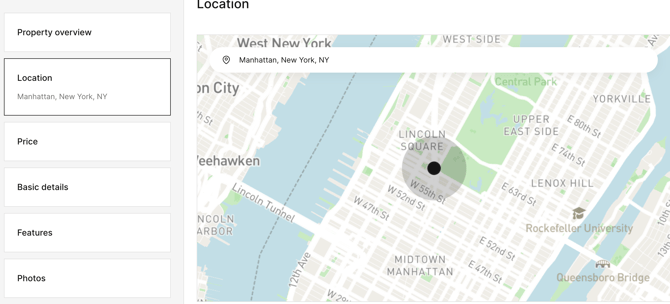
3. Pricing
You can choose between Show Price or Hide Price (Price on Request)
For Real Estate listings, if you select Hide Price, your listing will display as P.O.R. (Price on Request) — even if you fill in a price field.
P.O.R listings still appear in search results and can be filtered by price if it was filled in the form.

For other categories, if the price field is left empty, P.O.R will automatically appear instead.
4. Basic details
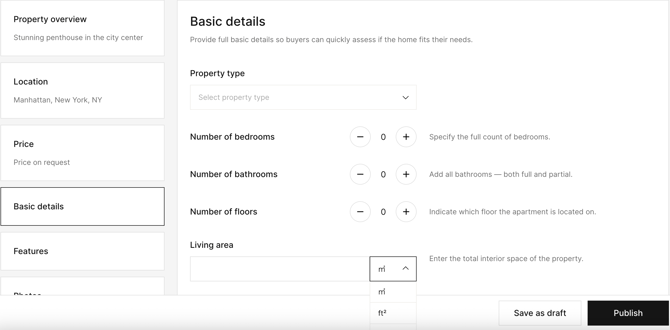
Select the property type and include vital information, such as the number of bedrooms and bathrooms.
Highlight the living and land area, and the number of floors.
You can also select the measuring units, but don't forget that any user can change their preferences in the settings.
5. Features
Enhance your listing with features and amenities. Help buyers find your property by applying the filters.
You can pick View, Outdoor, Indoor, and Lot features.
Please use only relevant features for the listing.
Note! This option is available for Real Estate listings only.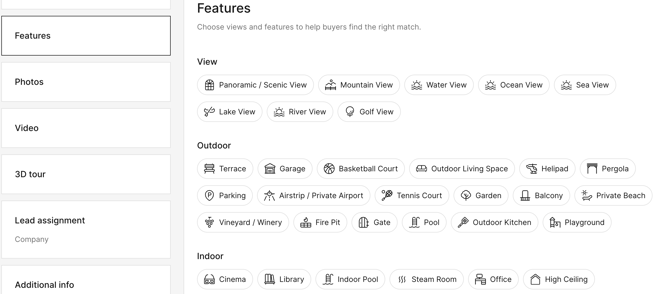
6. Photos
Click Upload Photos to choose photos from your device.
You can drag and drop to change the order of images — the first image will appear as the cover photo.
Please, use only landscape-oriented (horizontal) photos.
Upload at least two images with the recommended size and resolution.
You can always change their order by dragging and dropping them.

7. Media files ( videos and 3D tours)
Feel free to add media files, such as videos and 3D virtual Tours, to your properties.
Currently, we support the following video formats: YouTube, Vimeo, Brightcove.
And the following virtual tour formats: Matterport, My360 Virtual Tour, and others. The complete list can be found via the link in the form.
Please make sure your videos are set to public visibility so they can be uploaded successfully.
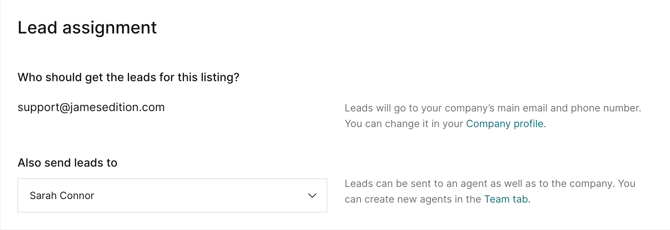
8. Leads Assignment
You can choose which email address will receive the leads for this property.
By default, they are sent to your company's primary email address, which you can review and amend in the Company's tab.
You can add and edit your agents via the Team section, and then assign them to the listings.
Please refer to this article for guidance on assigning agents.
9. Additional Information
You can include a license or internal listing ID to keep your listings organized:

!Note: You can save your listing as a Draft if you’d like to continue working on it later, or click the Publish button to upload it immediately. You also have the option to Exit Without Saving if you don’t want to keep your changes.
Please refer to this article for more details on this matter.
How to Edit a Listing
-
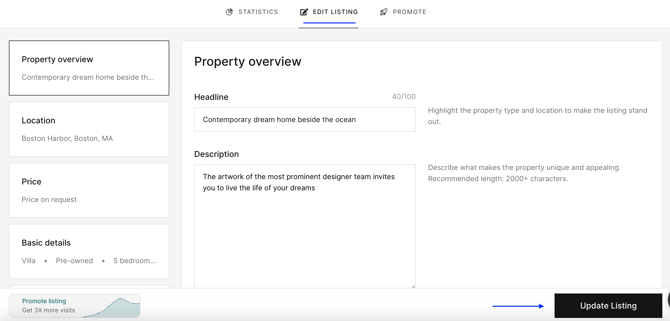
Open Listings and click the listing you’d like to edit — it will open in a pop-up window.
-
Click the Edit Listing tab.
-
Make your desired changes.
-
Click Update Listing to save your edits.
From the editing window, you can also:
-
-
Publish or Unpublish your listing.
-
Open it in your browser using the link View Live:
-

In this article, we reviewed how to add and edit listings in the Real Estate category. The process is the same for all other categories.
If you have any additional questions, please check our Help Center Articles here.