You can conveniently manage your team directly from within your business account. This makes it easier to keep your team structure up to date and ensure the right people have the right access at all times.
Please note: You can add agent details with Elite and Elite Plus subscriptions.
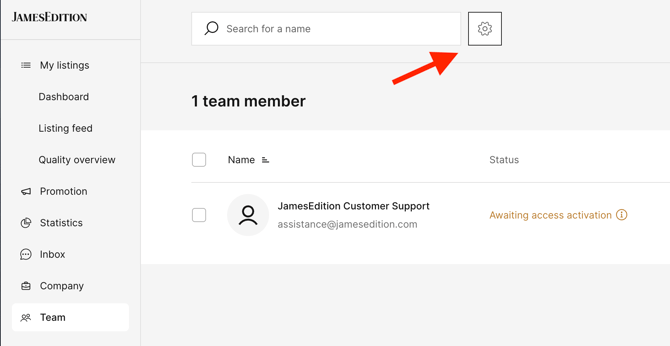
When you are logged in as an admin you will see your name in the upright corner of the screen. In the dropdown menu, click on the “Team” section, and it will take you to your agent's control panel.

In this section, you’ll see a list of all team members associated with your account. You can easily manage their details or make changes as needed.
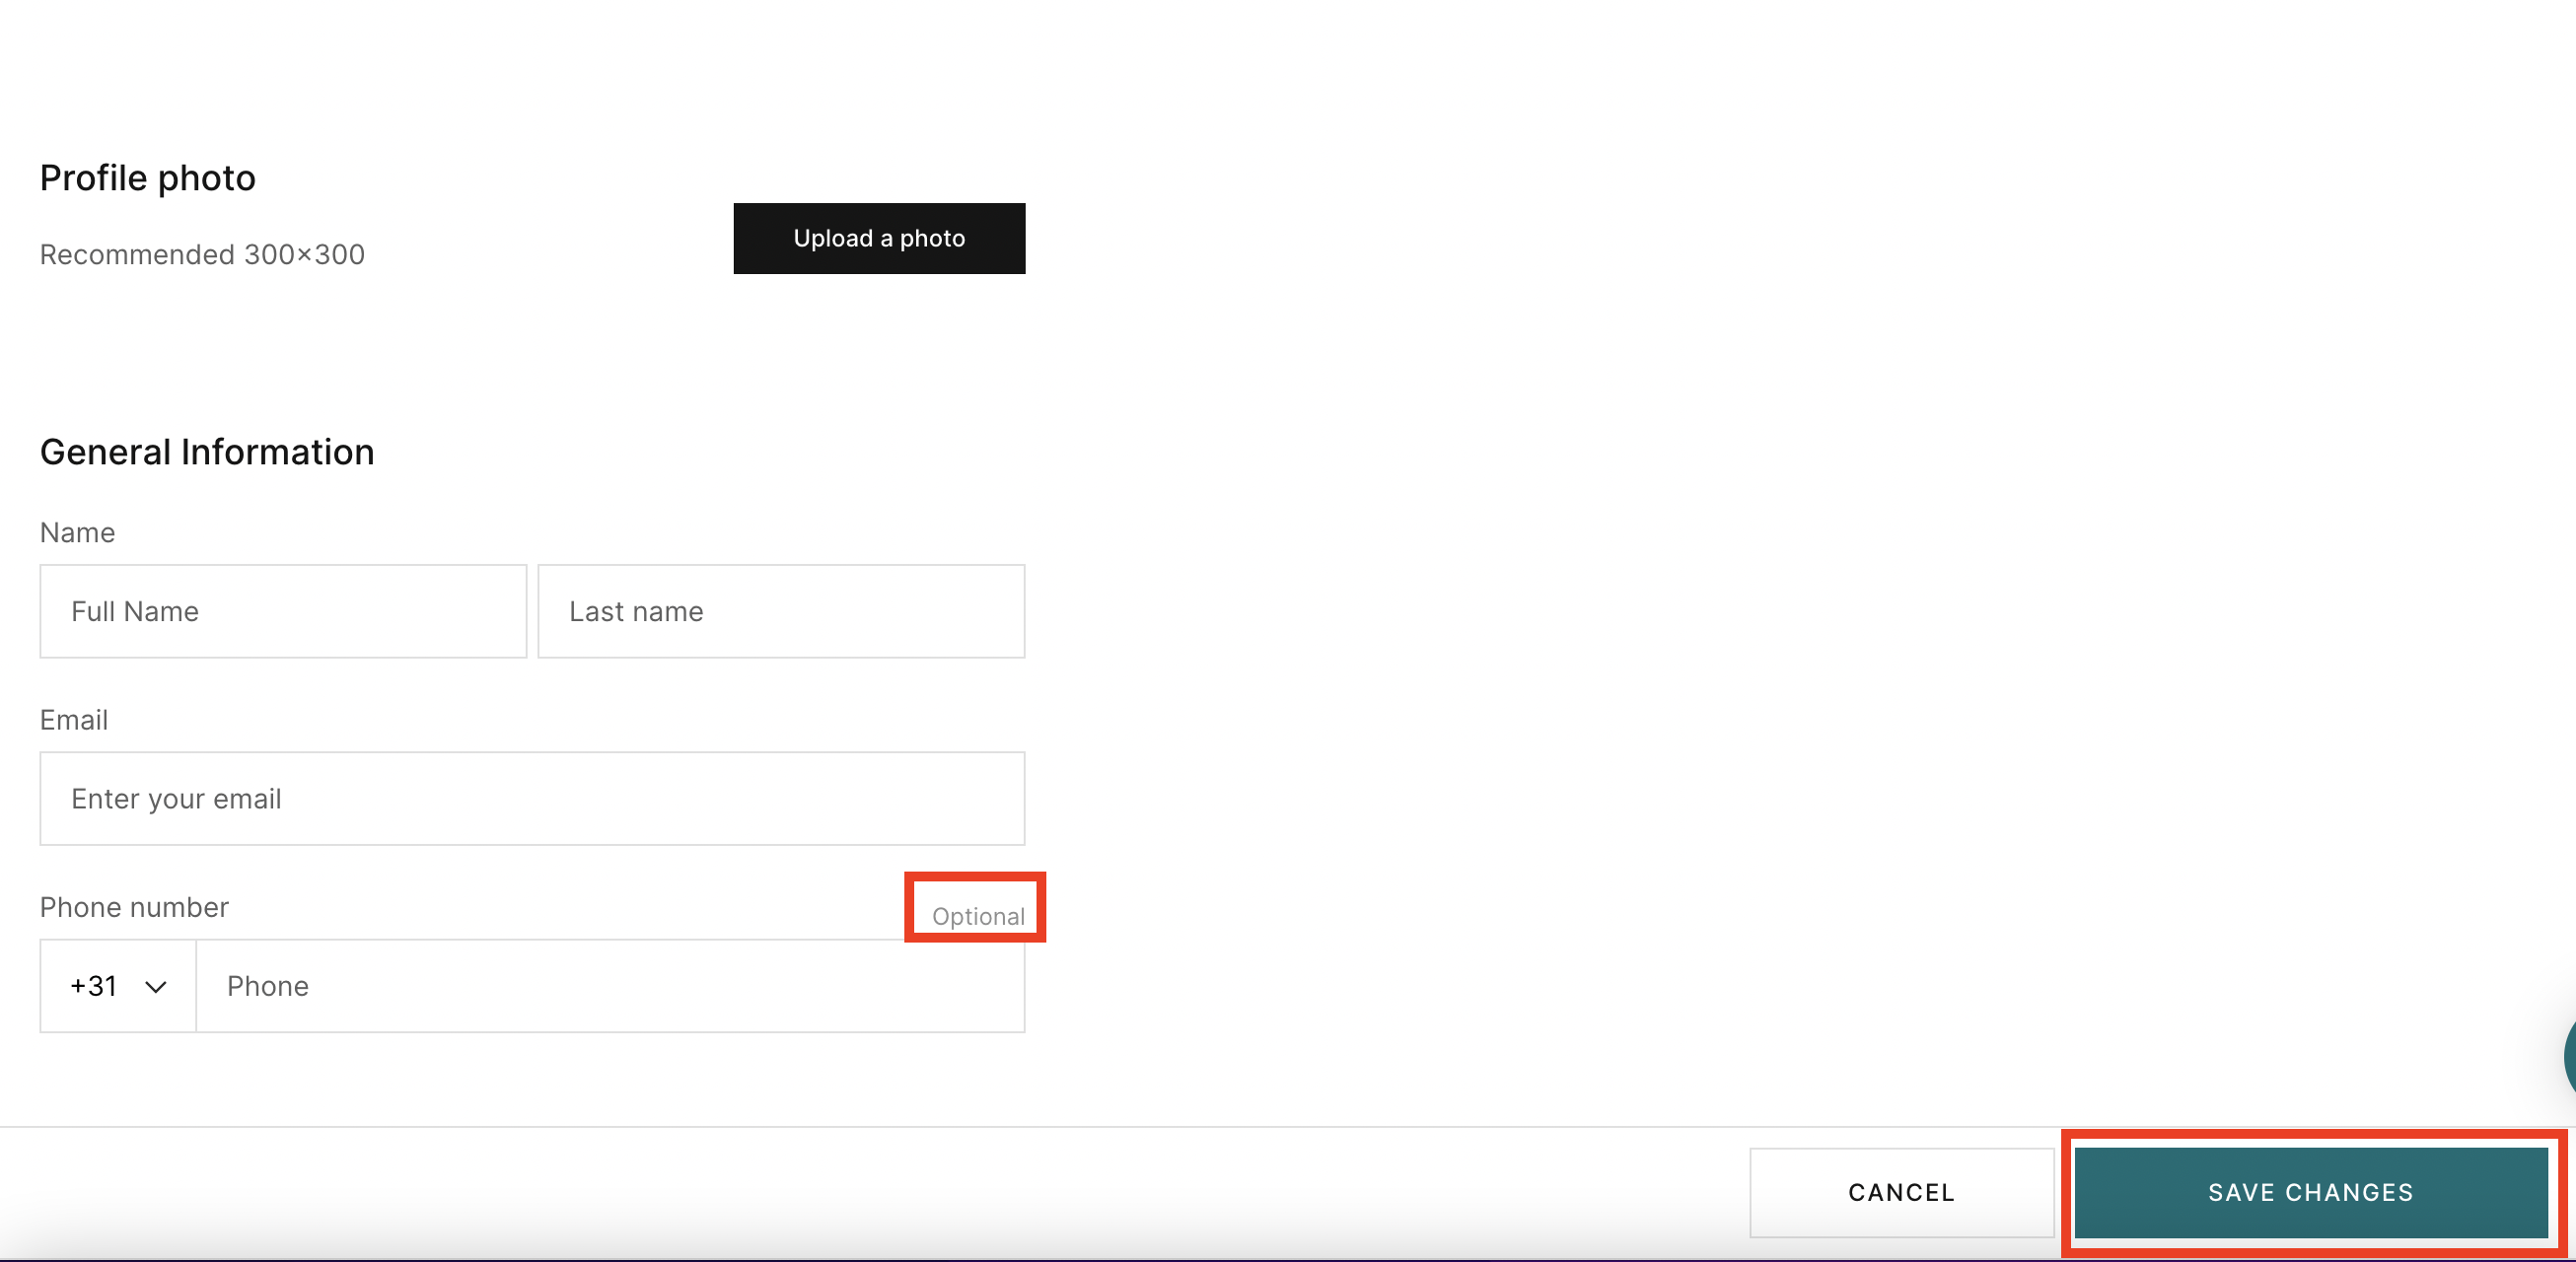
To add a new agent manually, click the green “Add team member” button. Then, enter their name and contact information, and upload a profile picture to complete the setup.

Agent Activation and Permissions
The phone number field is optional, in case you prefer to route all calls to your general business number.
After entering the relevant details, be sure to click Save to apply the changes.
Newly created agents will remain inactive by default. To activate an agent’s account and grant them access to their profile, click the email icon to send them an activation link. Once they receive and open the email, they’ll be able to log in and manage their own listings.
Please note: agents can only view and edit their own listings. Only the admin has the ability to manage or modify listings created by other team members.
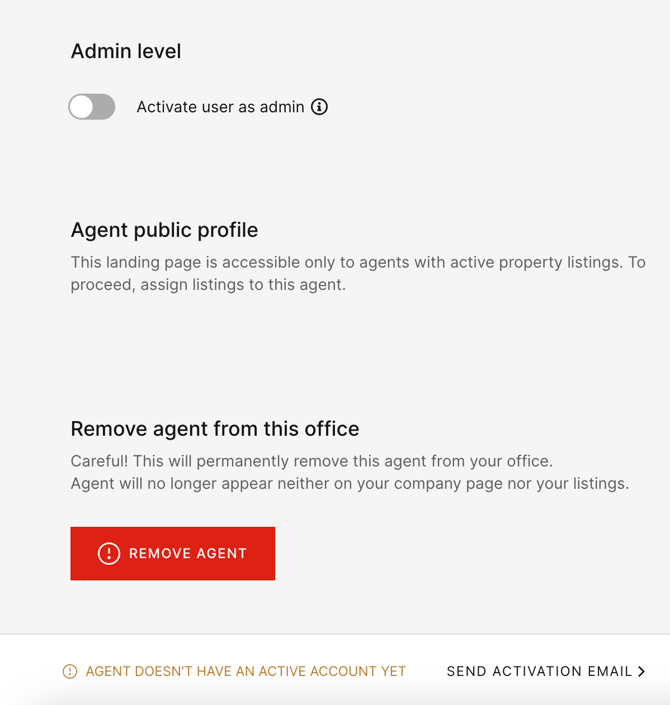
Granting Admin Access to an Agent
If you want to grant admin access to an existing agent, allowing them to manage the entire business profile, you can do so by using the admin activation toggle.
Please note that this action is only available after the agent profile has been created.
To proceed:
-
First, create the agent profile and save it.
-
Close the form and return to the team member list.
-
Then, click to edit the agent’s profile and enable the admin toggle to grant full access.

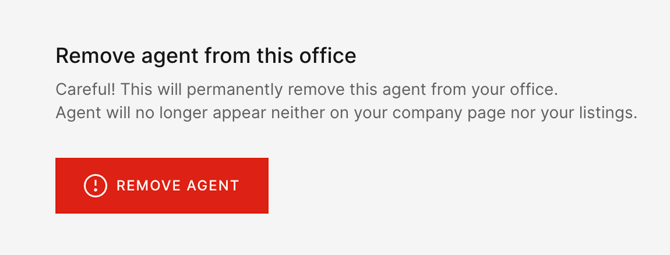
Removing an Agent from Your Team
To remove an agent, simply click on their profile to open the edit view. Then, scroll down to the bottom of the page and select “Remove agent.” This will permanently delete the agent from your team list.
Once an agent has been added to your team, you can assign them the listings they are responsible for managing.
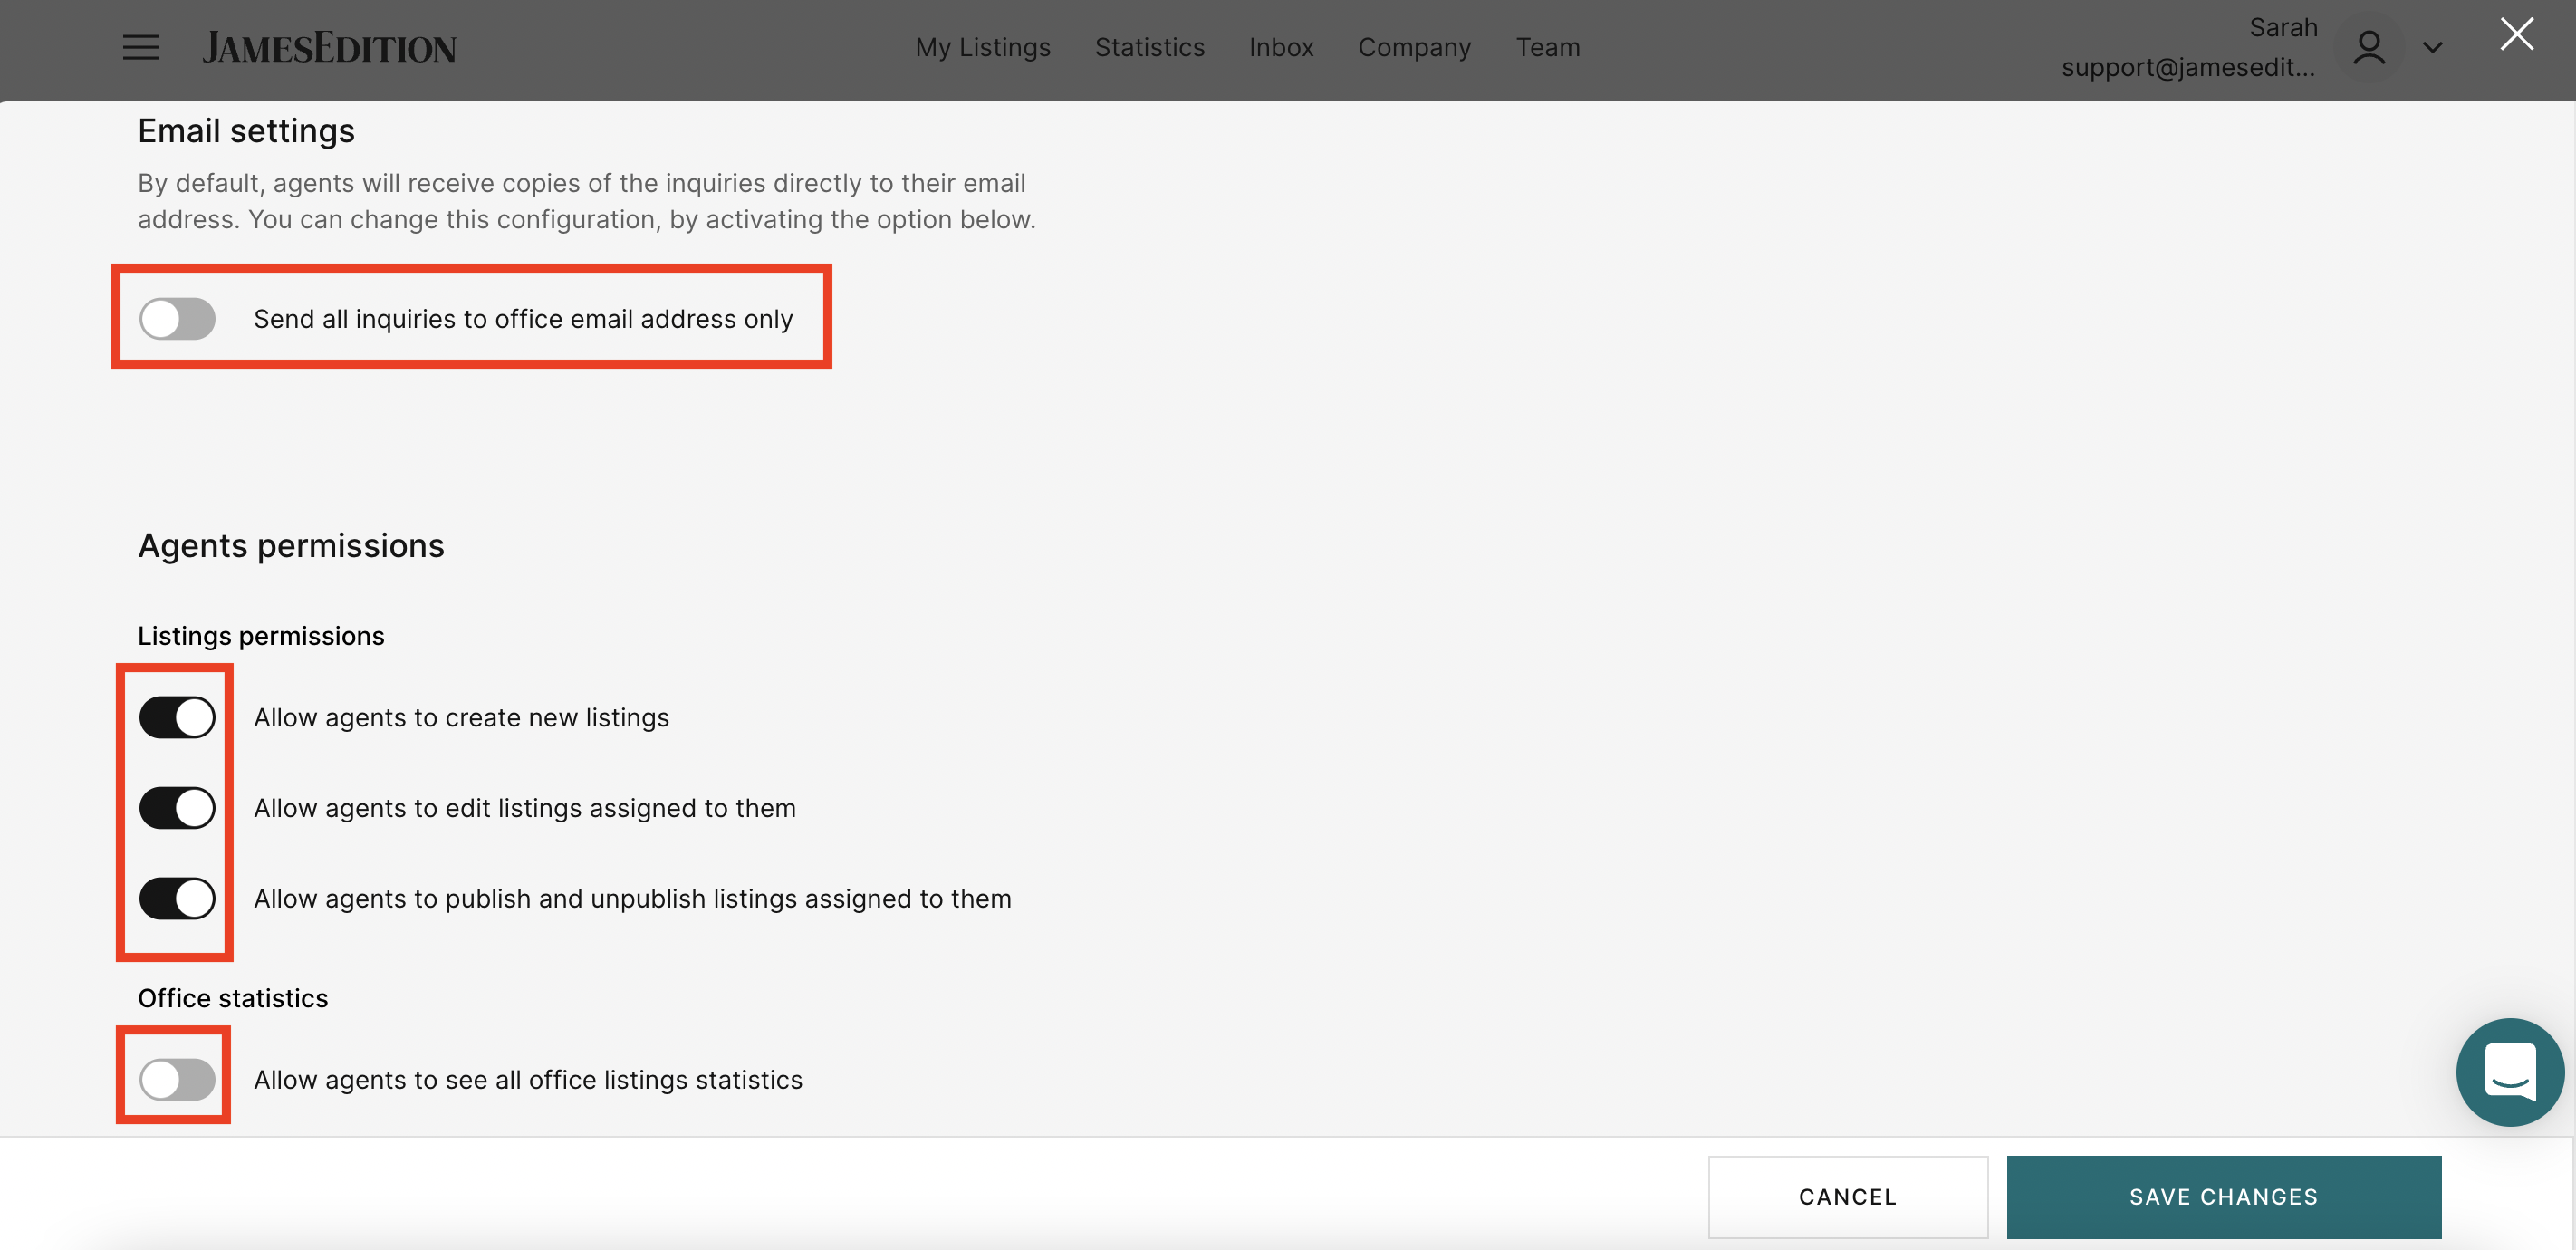
Additionally, you have the option to apply unified email settings across all team accounts
As the admin, you can choose how lead notifications are handled—either direct all leads to a single general email address, or allow leads to be forwarded to the assigned agent's email as well.
You also have control over your agents’ permissions. You can decide whether agents are allowed to:
-
Create new listings
-
Edit, publish, or unpublish listings assigned to them
-
Access performance statistics for the entire office
These settings allow you to tailor access and responsibilities based on your team's needs.
If you’d like to learn how to manually assign a listing to a specific agent, please refer to this article for step-by-step instructions.
If you have any additional questions, please check our Help Center Articles here or reach out via support@jamesedition.com